In this auspicious occasion, we are delighted to delve into the intriguing topic related to Alright, young artist! Let’s dive into the world of drawing and explore the fascinating world of the American Sign Language (ASL) alphabet! . Let’s weave interesting information and offer fresh perspectives to the readers.
Introduction
Alright, young artist! Let’s dive into the world of drawing and explore the fascinating world of the American Sign Language (ASL) alphabet!

Drawing the ASL Alphabet: A Fun Journey
Before we get started, tell me, what kind of drawings do you like to make? Are you more interested in realistic drawings or something more imaginative? Knowing your interests will help me tailor our lessons to your style!
The Magic of Drawing
Drawing isn’t just about putting pencil to paper; it’s a powerful tool for learning, expressing yourself, and having fun! It helps you:
- See the World Differently: Drawing forces you to pay close attention to shapes, lines, and details. It’s like having a magnifying glass for your eyes!
- Boost Your Creativity: Drawing lets your imagination run wild! You can create anything you can dream up, from fantastical creatures to magical landscapes.
- Improve Your Problem-Solving Skills: Drawing involves figuring out how to represent things on paper. It’s like a puzzle, and you get to be the master puzzle solver!
- Strengthen Your Hand-Eye Coordination: Drawing requires precision and control. It’s like training your hands to be super-skilled!

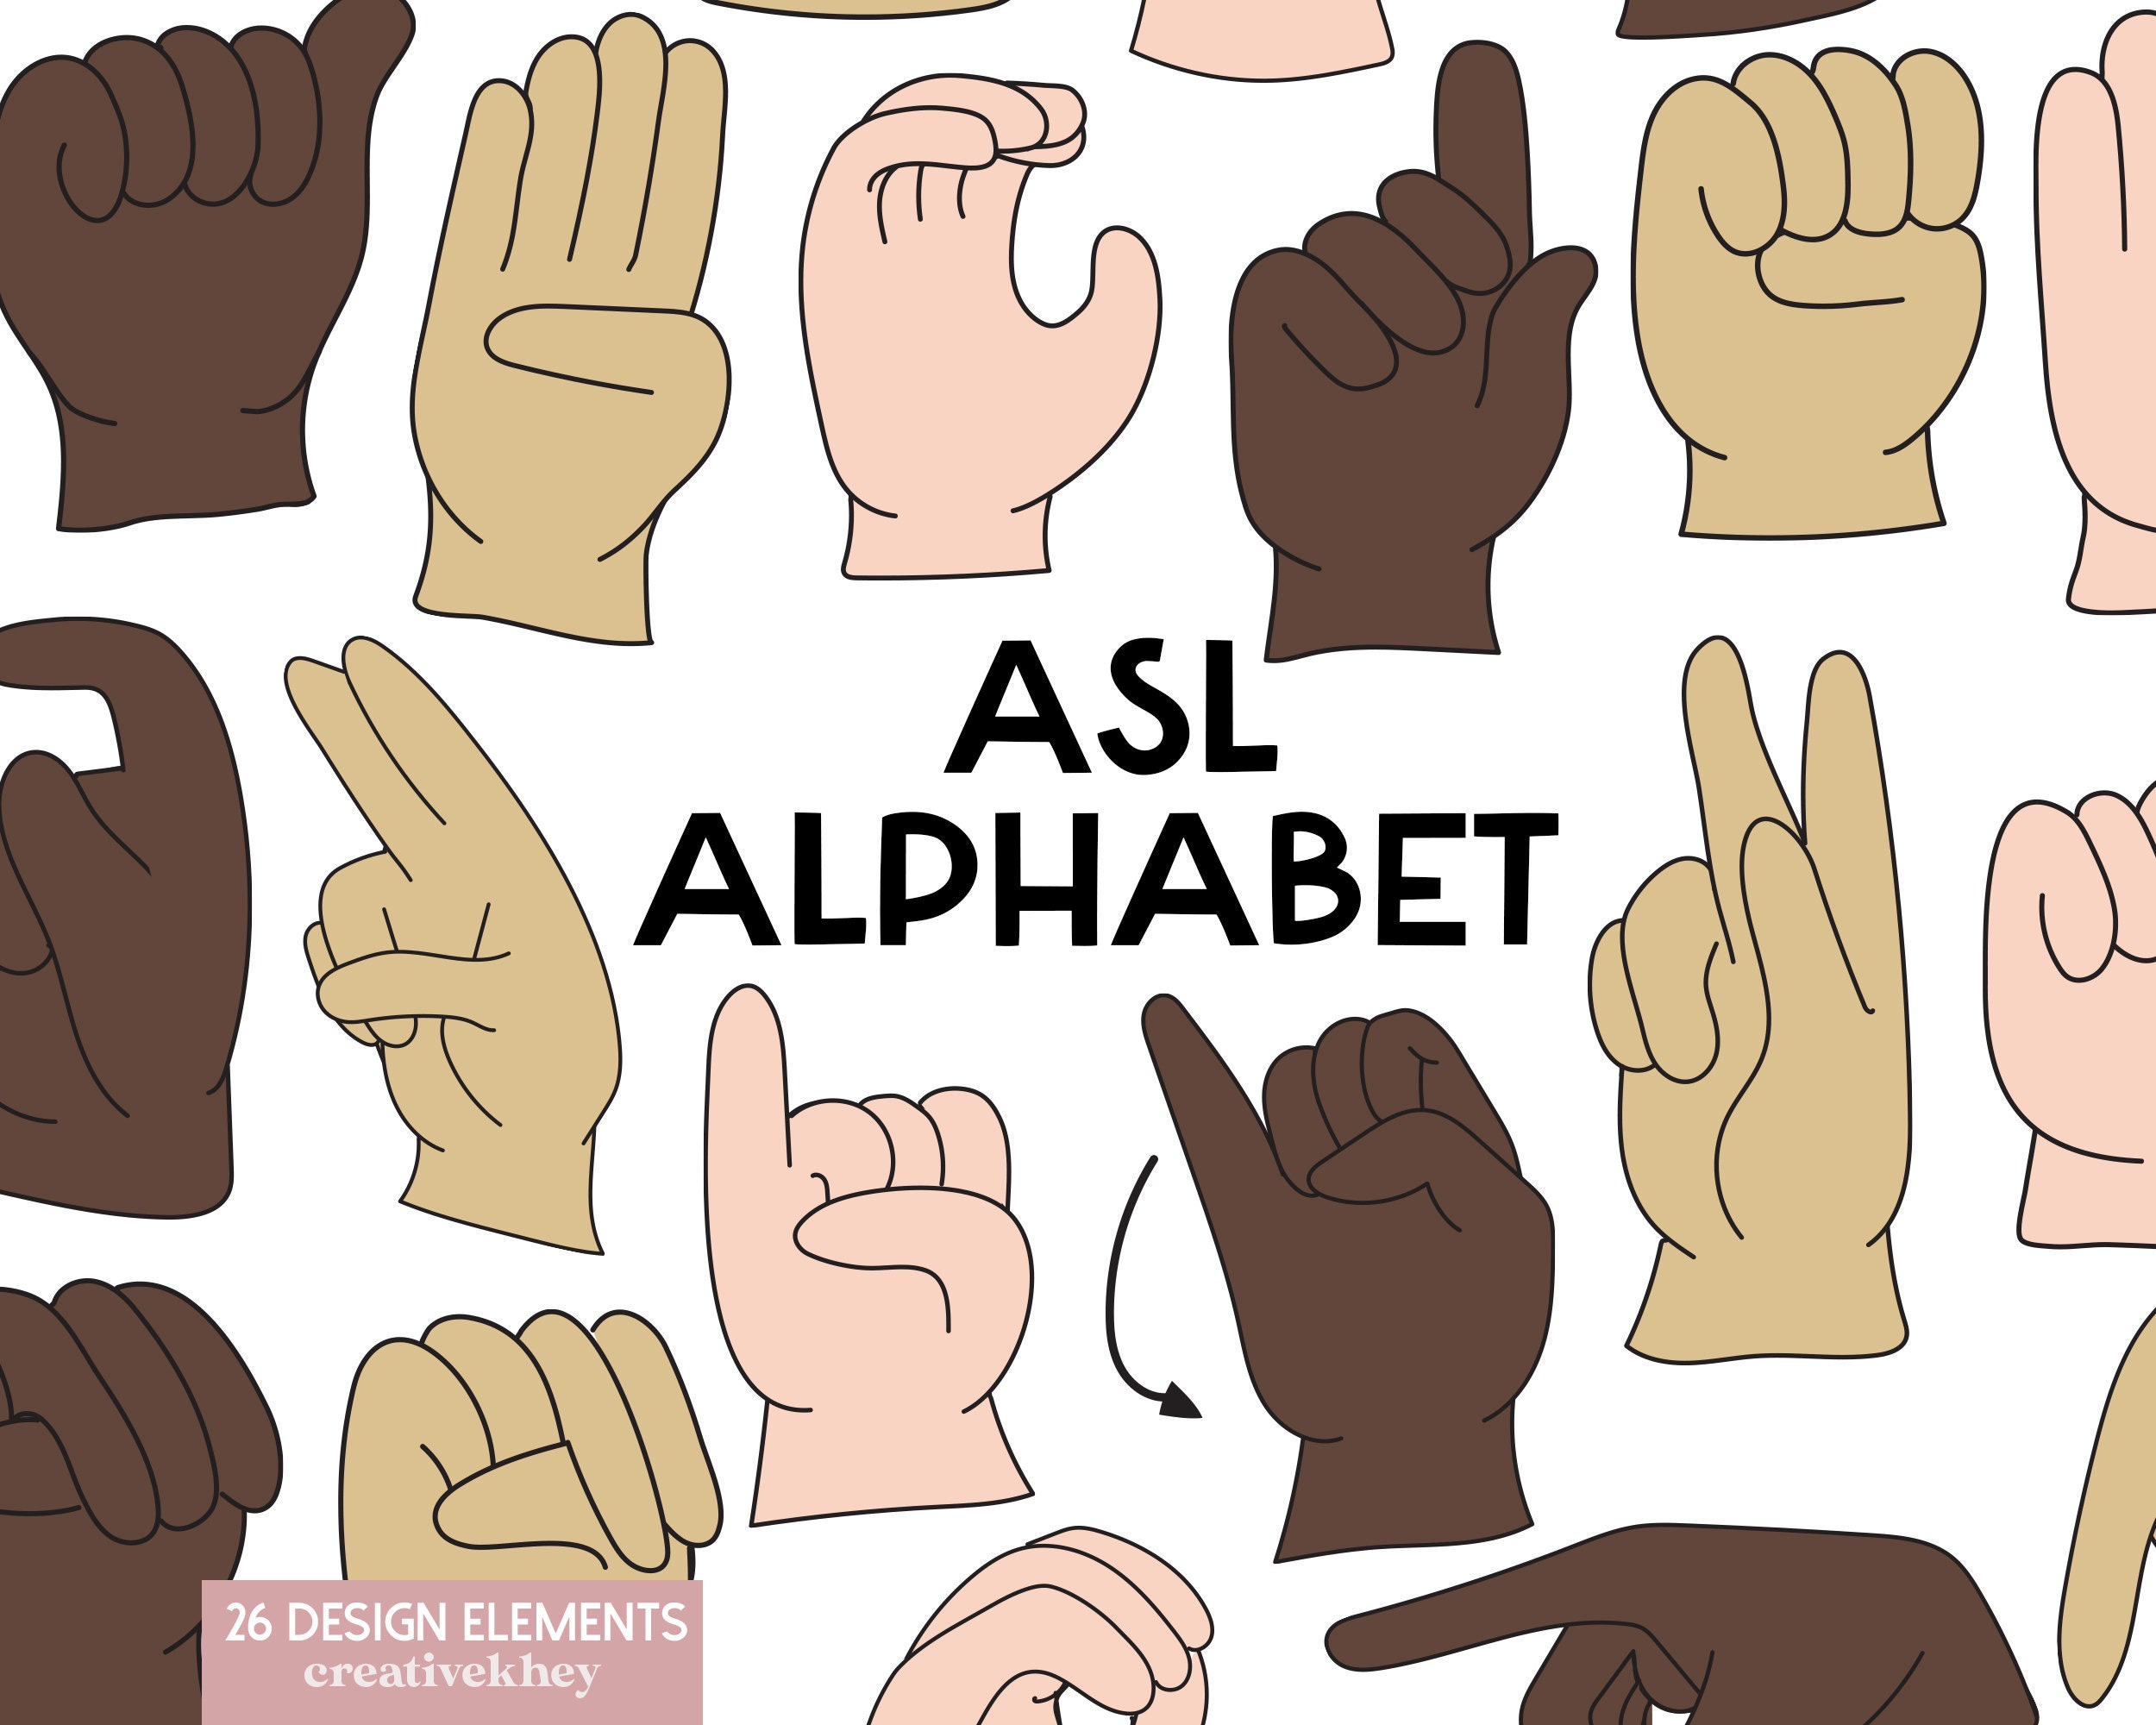
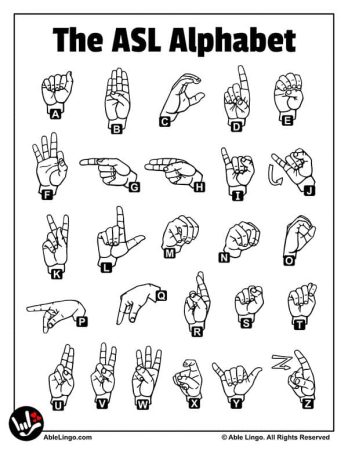
Getting Started with the ASL Alphabet
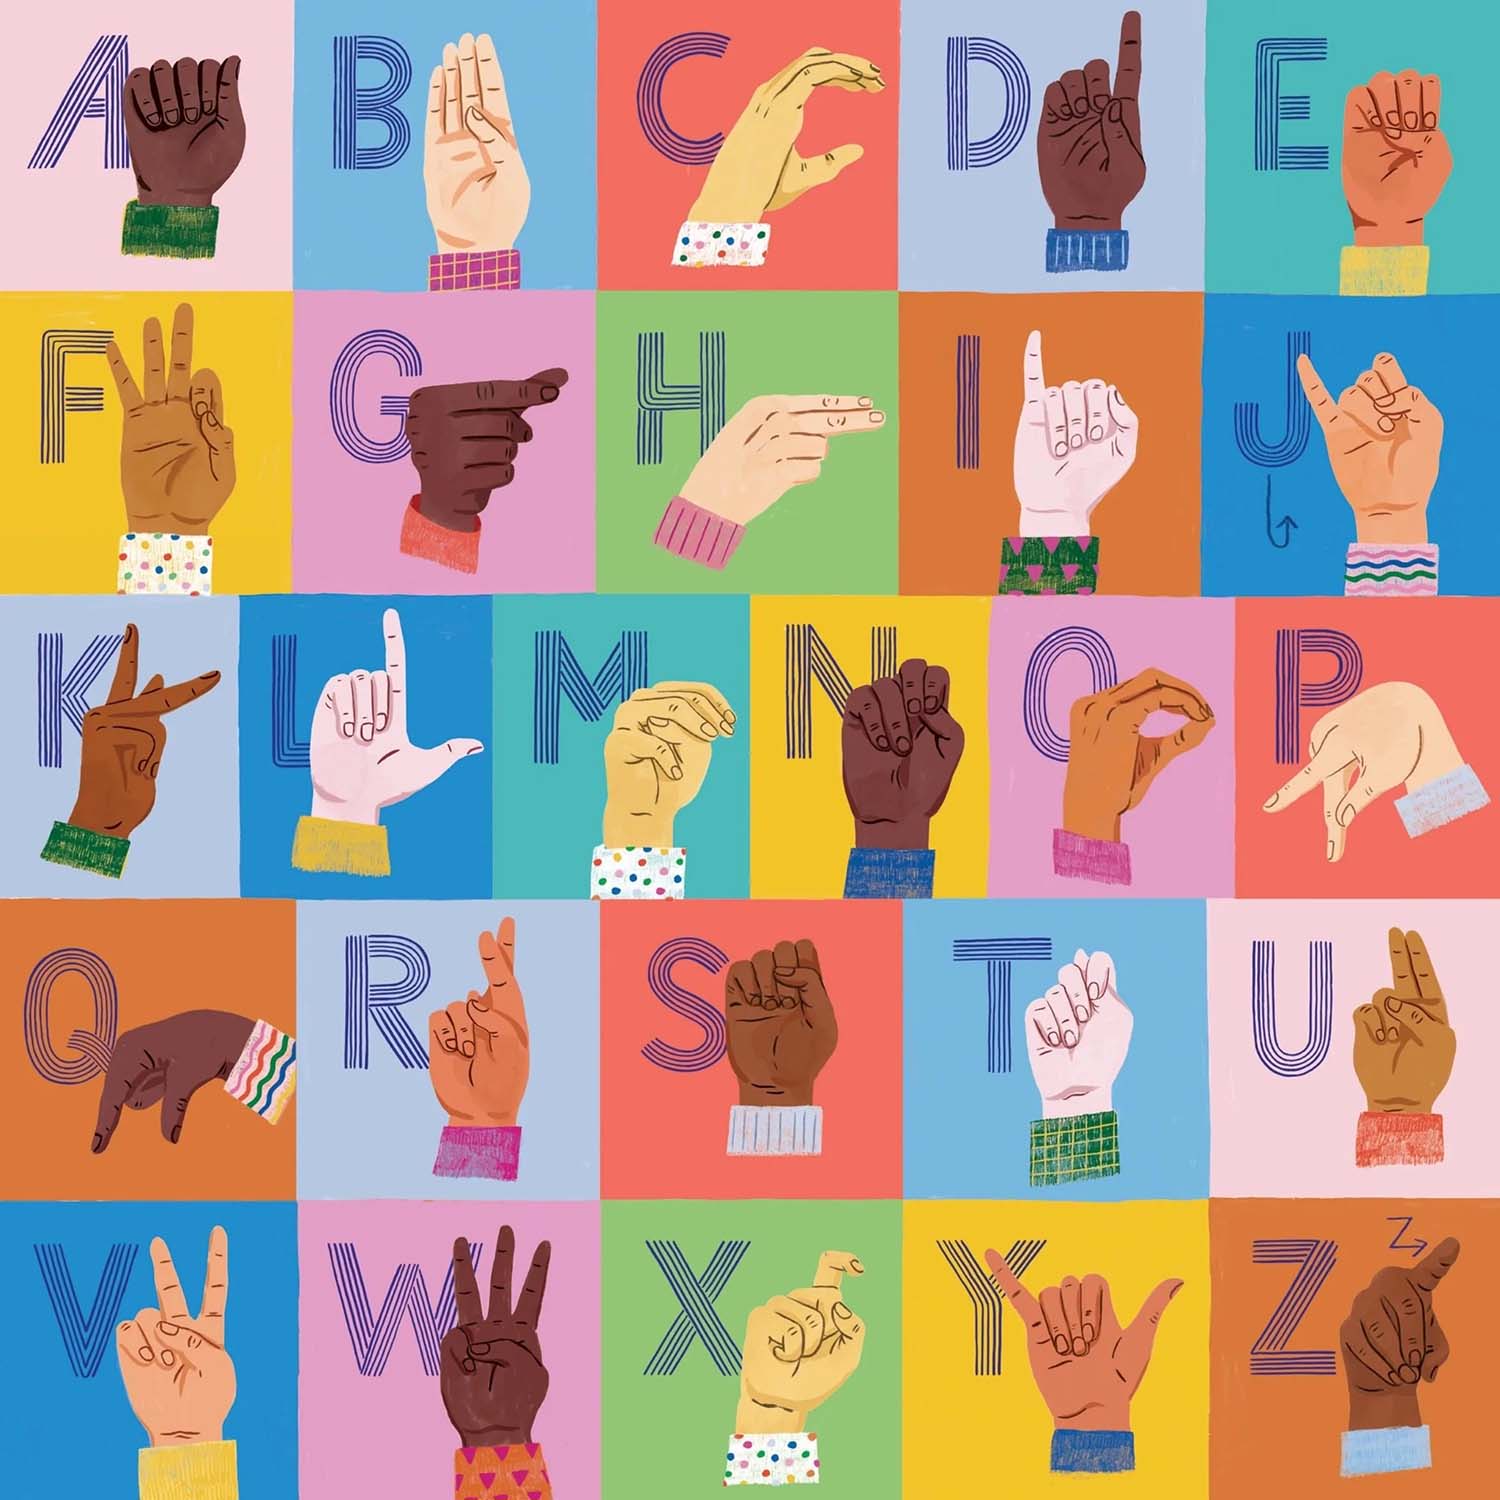
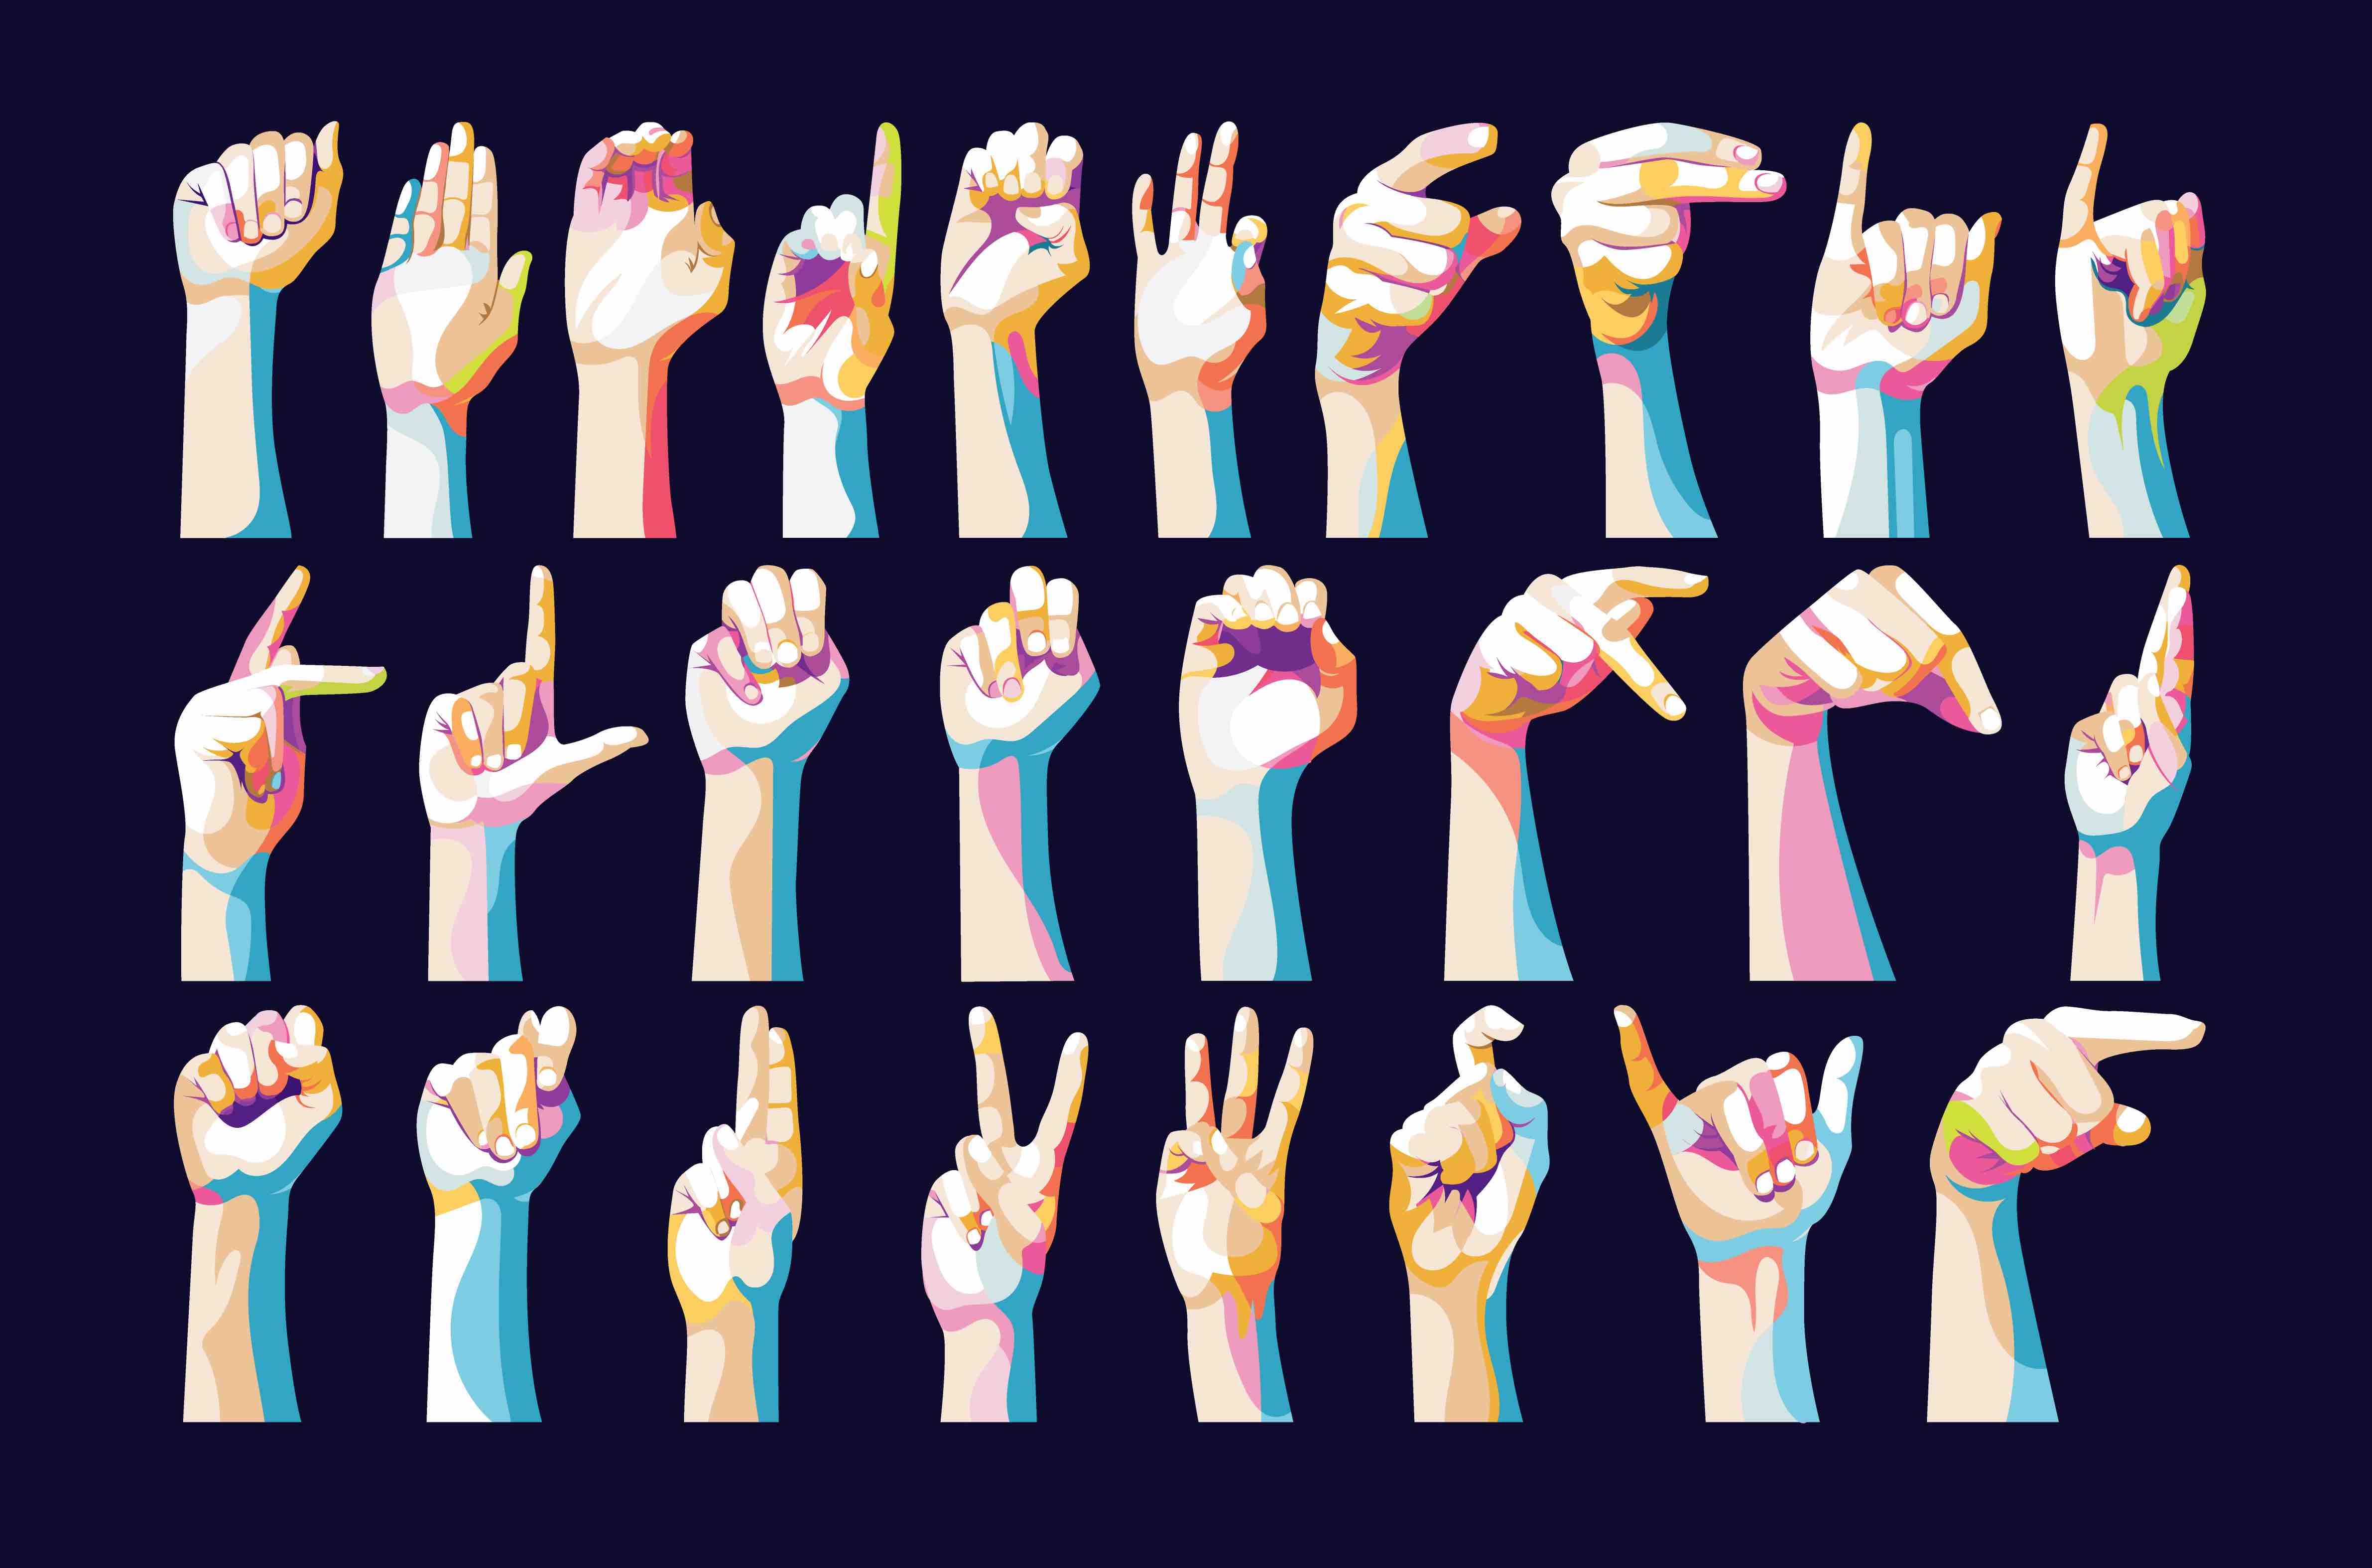
Now, let’s explore the ASL alphabet! It’s a beautiful language that uses hand shapes and movements to express words. Drawing these hand shapes is a great way to learn the alphabet and improve your drawing skills.
1. Basic Shapes:
- Circles and Ovals: Many ASL letters are based on circles and ovals. Practice drawing these shapes in different sizes and positions.
- Lines: Lines are essential for creating the outlines and details of the hands. Practice drawing straight, curved, and diagonal lines.
- Triangles and Squares: Some letters, like "G" and "T," involve triangles and squares. Get comfortable drawing these basic geometric shapes.
2. Hand Anatomy:
- Fingers: Each finger has its own shape and position. Practice drawing individual fingers, focusing on their curves and joints.
- Palm: The palm is the base of the hand. Draw a slightly curved shape for the palm and practice adding lines to show the creases.
- Thumb: The thumb is unique and can be positioned in different ways. Practice drawing thumbs in various positions, from extended to curled.
3. Putting It All Together:
- Start with Simple Letters: Begin with letters like "A," "B," "C," and "D." These letters have simpler hand shapes.
- Focus on the Hand Shape: Pay attention to the overall shape of the hand and the positions of the fingers.
- Add Details: Once you’ve drawn the basic hand shape, add details like lines to show the creases and wrinkles.
- Practice, Practice, Practice: The more you draw, the better you’ll get! Don’t be afraid to make mistakes; they are part of the learning process.
Let’s Draw Some Letters!
A: Start with a circle for the palm. Then, draw two lines for the index finger and middle finger pointing straight up.
B: Draw a circle for the palm. Then, draw a curved line for the thumb, and another curved line for the index finger pointing up.
C: Draw a circle for the palm. Then, draw a curved line for the thumb, and another curved line for the pinky finger pointing up.
D: Draw a circle for the palm. Then, draw a curved line for the thumb, and another curved line for the pinky finger pointing up.
E: Draw a circle for the palm. Then, draw a curved line for the thumb, and another curved line for the pinky finger pointing up.
F: Draw a circle for the palm. Then, draw a curved line for the thumb, and another curved line for the pinky finger pointing up.
G: Draw a circle for the palm. Then, draw a curved line for the thumb, and another curved line for the pinky finger pointing up.
H: Draw a circle for the palm. Then, draw a curved line for the thumb, and another curved line for the pinky finger pointing up.
I: Draw a circle for the palm. Then, draw a curved line for the thumb, and another curved line for the pinky finger pointing up.
J: Draw a circle for the palm. Then, draw a curved line for the thumb, and another curved line for the pinky finger pointing up.
K: Draw a circle for the palm. Then, draw a curved line for the thumb, and another curved line for the pinky finger pointing up.
L: Draw a circle for the palm. Then, draw a curved line for the thumb, and another curved line for the pinky finger pointing up.
M: Draw a circle for the palm. Then, draw a curved line for the thumb, and another curved line for the pinky finger pointing up.
N: Draw a circle for the palm. Then, draw a curved line for the thumb, and another curved line for the pinky finger pointing up.
O: Draw a circle for the palm. Then, draw a curved line for the thumb, and another curved line for the pinky finger pointing up.
P: Draw a circle for the palm. Then, draw a curved line for the thumb, and another curved line for the pinky finger pointing up.
Q: Draw a circle for the palm. Then, draw a curved line for the thumb, and another curved line for the pinky finger pointing up.
R: Draw a circle for the palm. Then, draw a curved line for the thumb, and another curved line for the pinky finger pointing up.
S: Draw a circle for the palm. Then, draw a curved line for the thumb, and another curved line for the pinky finger pointing up.
T: Draw a circle for the palm. Then, draw a curved line for the thumb, and another curved line for the pinky finger pointing up.
U: Draw a circle for the palm. Then, draw a curved line for the thumb, and another curved line for the pinky finger pointing up.
V: Draw a circle for the palm. Then, draw a curved line for the thumb, and another curved line for the pinky finger pointing up.
W: Draw a circle for the palm. Then, draw a curved line for the thumb, and another curved line for the pinky finger pointing up.
X: Draw a circle for the palm. Then, draw a curved line for the thumb, and another curved line for the pinky finger pointing up.
Y: Draw a circle for the palm. Then, draw a curved line for the thumb, and another curved line for the pinky finger pointing up.
Z: Draw a circle for the palm. Then, draw a curved line for the thumb, and another curved line for the pinky finger pointing up.
FAQs about Drawing the ASL Alphabet
1. What kind of pencil should I use?
Any pencil will do! You can start with a regular HB pencil, but you can also experiment with different types of pencils, like 2B or 4B, for darker lines.
2. How can I make my drawings look more realistic?
Practice, practice, practice! The more you draw, the better you’ll become at capturing details and creating realistic effects. You can also use shading techniques to add depth and dimension to your drawings.
3. What if I can’t draw a letter perfectly?
That’s totally okay! No one is perfect, and drawing is all about learning and improving. Don’t be afraid to make mistakes. They are part of the journey!
4. How can I make my drawings more creative?
Let your imagination run wild! You can add colors, patterns, textures, and even backgrounds to your drawings. You can even create your own ASL alphabet characters or stories!
5. Is there anything else I can draw besides the ASL alphabet?
Absolutely! You can draw anything you can imagine! Draw your favorite animals, plants, objects, or even your own made-up creatures. The world of drawing is your oyster!
Remember, drawing is a journey, not a race. Enjoy the process, have fun, and let your creativity flow!

Thus, we hope this article has provided valuable insights into Downloads Alright, young artist! Let’s dive into the world of drawing and explore the fascinating world of the American Sign Language (ASL) alphabet! . We appreciate your attention to our article. See you in our next article!